Showing posts with label Techie Tech. Show all posts

Saturday, 25 January 2014

SSIS 2012: Data Extraction BY Dummy

Scribbled by TeddieDebbie at 12:32 0 scream(s)
Note: Cuppycakes that came to this entry because it's really urgent to know how, kindly Ctrl+F "Begin:" to get to the point.

Also, please note that this is a tutorial/article/post/whatever-it-is is written by a Dummy (aka moi), not for Dummy ha.

* * * * * * * * * * * * * * * * * * * *

Psst psst. Eh I tell you a secret ah. Shhh! Don't tell anyone OK! Erhm ok fine you may tell your friend but make sure your friend also keep quiet OK! And your friend's friend too!

Ahem *clear throat* Ok lah I'm telling you now. I am the biggest idiot in the world because I query the data straight from database and copy rowS by rowS to Excel file (must stress the 'S' which stands for plural coz it sounds less idiotic wtf). Well, to my defense, the data was so big I had to copy part by part coz otherwise it will have OutOfMemory error wtf and when the same error occurs few more times, the whole damn SQL Server Management Studio will crash and ask for restart and then I'll have to re-query the whole damn thing again.

I'll pause for 1 sec for you to laugh.

.

You done yet? Nehmind. Not that I care.

I tell you. When Serena knew this, she's almost like this --> (OS: WHY YOU SO IDIOT GEH!!! THROW MY FACE NIA!!!)

DEAR SIFU, MOI IZ SORRY!

Like I said, it was a major major major facepalm (IKR) especially when the data I extract from my workplace is so so so so so huge I do until I wanna die wtf. I still cannot figure why I didn't think of any of the solutions wtf. Nah I punish myself like Dobby the Elf

* * * * * * * * * * * * * * * * * * * *

Begin:

Side note: I'm gonna reuse the dummy data created previously at here.

Of course to extract your data, you have to have your query prepared lah. If the query is complicated, as in having a lot of join tables, try fine tune it using CTE. If the data is mad huge, try export it 100k by 100k or 10k by 10k, depending on your data size. The one I have in my workplace is a combination of both so I had to use both methods ie using CTE and exporting it out 100k by 100k wtf but I promise this tutorial is gonna be very simple.

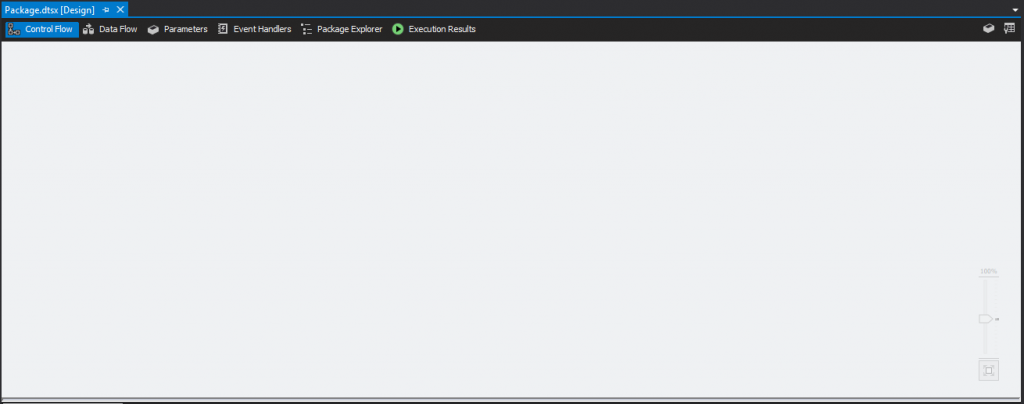
Step 1: Create a new SSIS project. Duh. Then double-click 'Package.dtsx' (default package name. You may rename it)
Step 2: A blank 'canvas' will show as above image.
Click to enlarge
Step 3: To start off with something, click and drag the 'Data Flow Task' from SSIS Toolbox.
Step 4: Drag the 'Data Flow Task' to the blank canvas as shown in above screenshot.
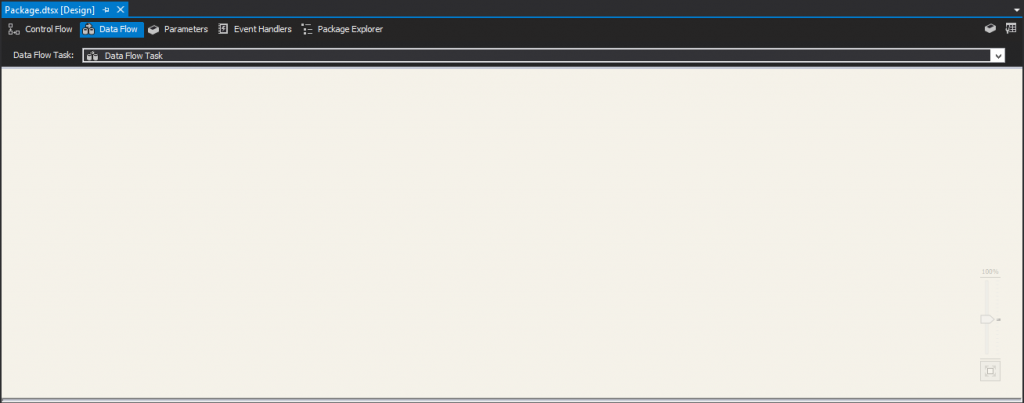
Step 5: You may double-click the 'Data Flow Task' from previous step to come to this screen or straightaway click on the 'Data Flow' tab at the top.
Click to enlarge
Step 6: Click and drag the ADO NET Source (I'm using MSSQL Server) from SSIS Toolbox to the empty canvas under the tab of 'Data Flow'.
Step 6: Click and drag the Excel Destination (I'm gonna export the data to Excel file) from SSIS Toolbox to the empty canvas under the tab of 'Data Flow'.
Step 7: After the click and drag, you will see something similar to the shown image. Pull the blue arrow from the ADO NET Source and attach the end of it to the Excel Destination. The red arrow indicates the handling of error. You may try creating a text file (Flat File Destination) for the error log.
Double click on the ADO NET Source bubble.
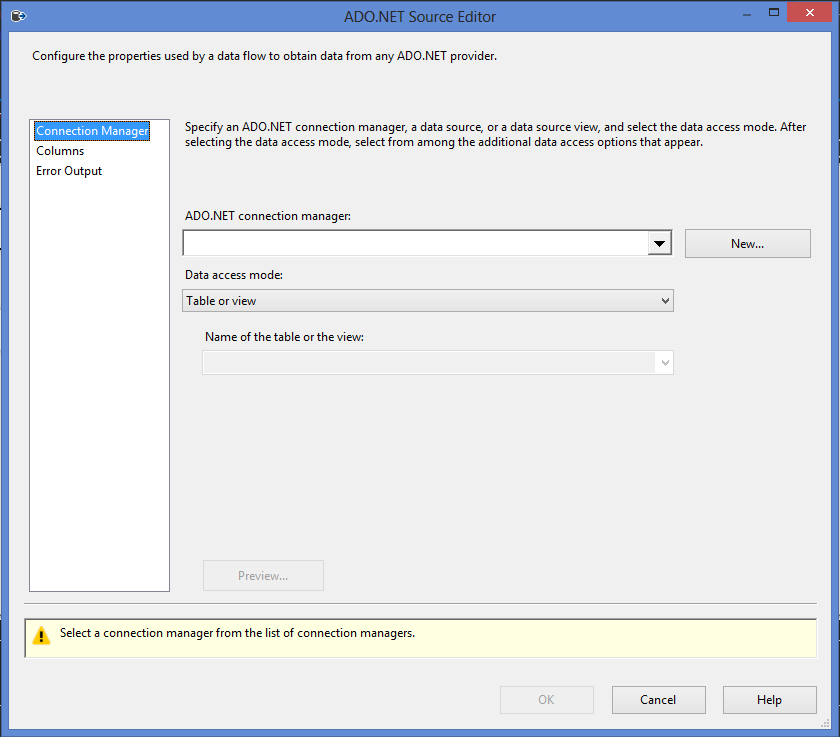
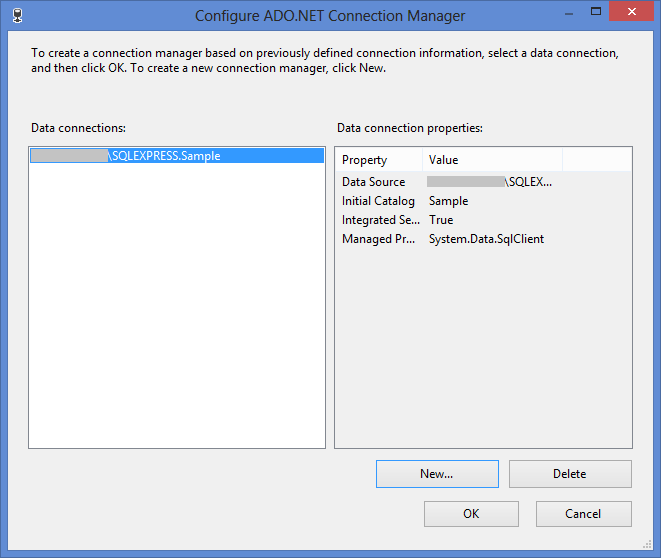
Step 8: You'll be asked to create a connection to related db. Click on 'New...' to create a new connection.
Click to enlarge
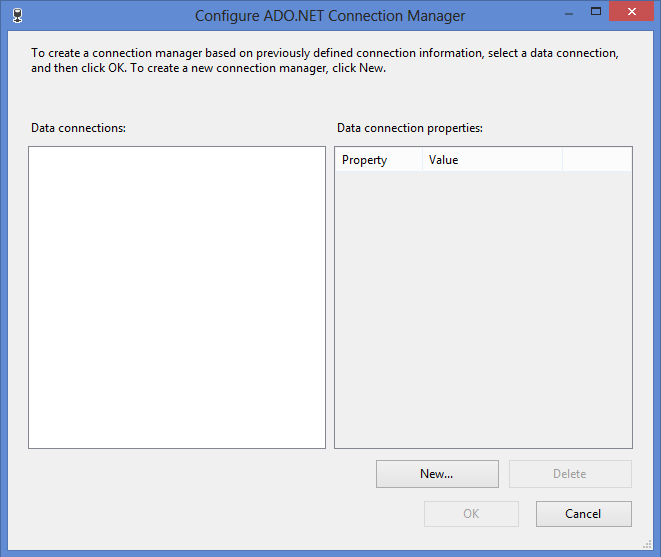
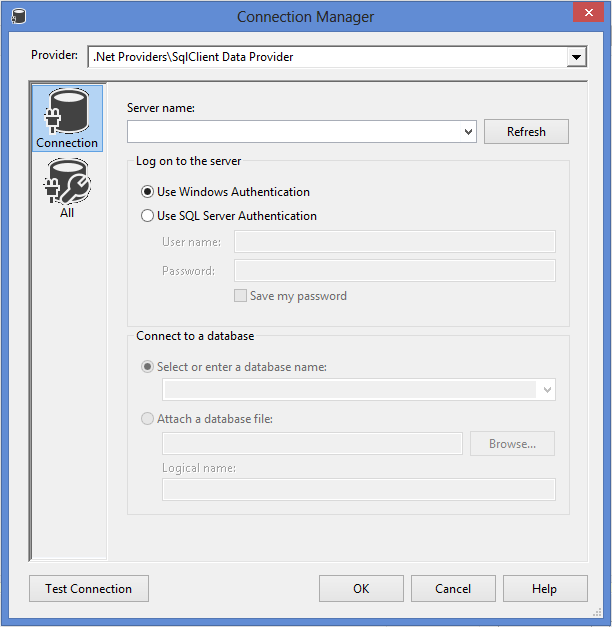
Step 9: Connection configuration windows will pop up. Click 'New...' for new connection.
Click to enlarge
Step 10: Fill in all necessary details, then click on 'Test Connection' to ensure the connection is working.
Click to enlarge
Thumbs up if you see this. =) Otherwise... Keep trying until you see this wtf.
Click to enlarge
This is what you should be seeing next. Click 'OK'.
Click to enlarge
Step 11: After configuring the connection, you may choose the way you get your db query. It can either be Table or view, or SQL Command.
Step 12a: If you need to get data from 1 table/view, you can simply choose 'Table or view' and select the table/view you wanna get the data from.
Step 12b: Otherwise this is where you can put your complicated query.
You can either choose from step 12a or 12b but not both.
This is how it looks like when you've done configuring the db connection =)
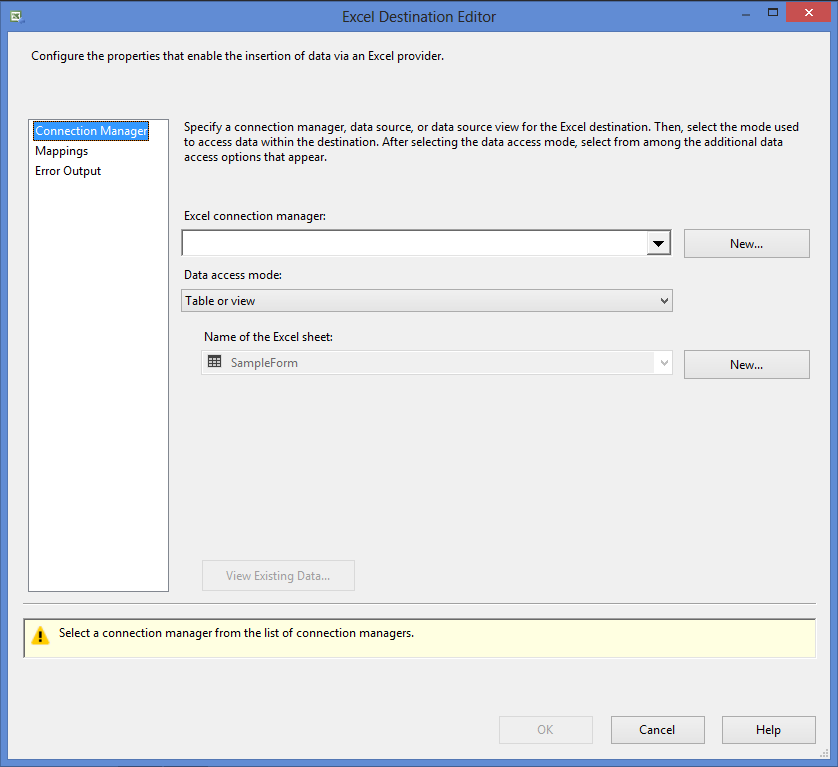
Step 13: Now double click on the Excel Destination bubble and this windows will pop up. Click 'New...' for the Excel connection manager.
Click to enlarge
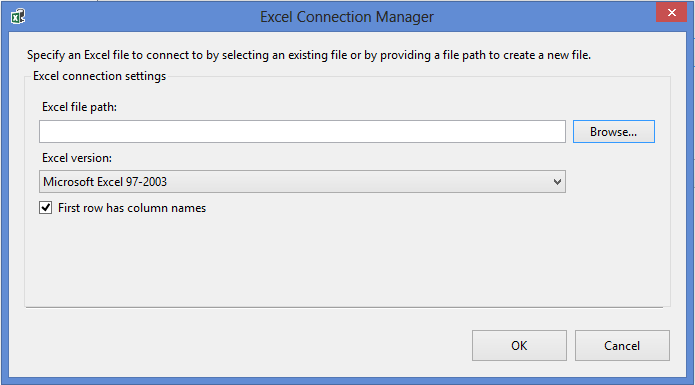
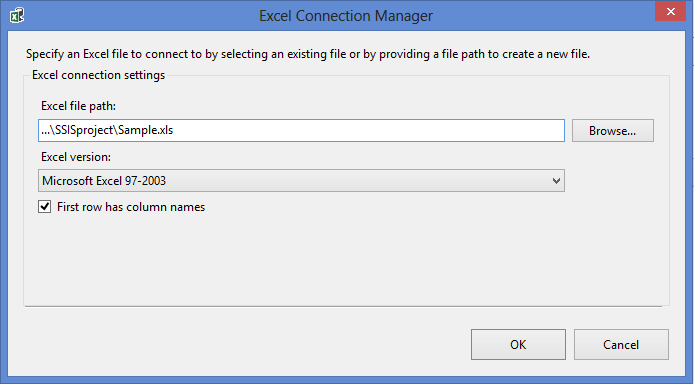
Step 14: This windows will pop up and get the destination file path. Click 'Browse...' if you haven't decide where to put it. It has to be existing Excel file but doesn't matter if it's empty or not.
Click to enlarge
Click 'OK' when you're done.
Click to enlarge
Step 15: Remain selecting 'Table or view' and click 'New...' for new Excel sheet name.

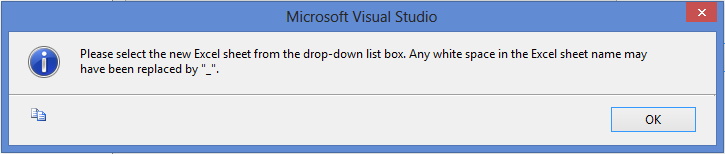
Step 16: New windows will pop up and requires you to create a new table. Rename 'Excel Destination' and remove the '`' symbol as per following screenshot. I renamed mine as 'SampleFile'. It will be the Excel sheet's name.
Step 17: This windows will pop up but no worries, keep calm, just click 'OK', and proceed =)
Click to enlarge
Step 18: You'll be selecting your Excel sheet. Choose the one you've just created.
When you're done with the Excel Destination configuration, this is what you'll see at the bottom.
Step 19: Start debugging!
Step 20: Let it run for awhile and check at the status when it's done. (Refer pointing arrow)
Click to enlarge
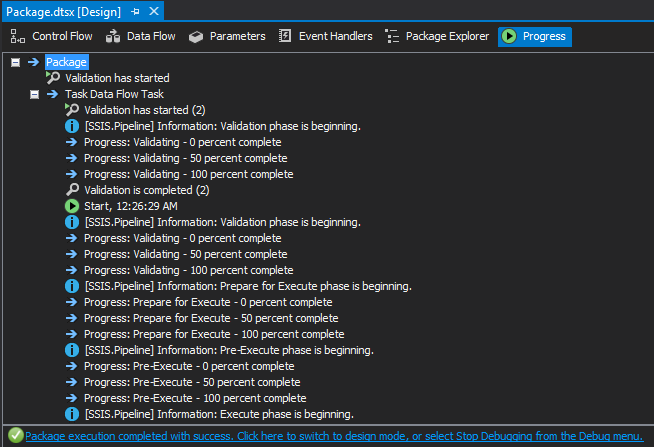
Step 21: You may click on the status bar from the previous step, or straightaway go to the 'Progress' tab as shown in the image. (Refer pointing arrow)
Click to enlarge
This is what SSIS have done. If there's error, it will be shown here too.
Click to enlarge
VOILA! Your data is extracted! ^^ You can check your destination file path and open the Excel file to check what's inside ^^

Here's a screenshot of what I've mentioned in step 16:
Sheets name
Tadaa! You can now export a lot of data into 1 single files (only with shit loads of sheets lolol) ^^

Oh oh btw hor! I found another way of extracting data from the db using SSIS! See here! (Told you this is an entry written by Dummy lor wtf)

Happy experiencing around! =)
Categories ,
Share/Like to turn a rhinoceros into a unicorn!

Tuesday, 14 January 2014

SSRS 2012: Decision Function (IIF & SWITCH)

Scribbled by TeddieDebbie at 12:06 0 scream(s)
Note: Cuppycakes that came to this entry because it's really urgent to know how, kindly Ctrl+F "Begin:" to get to the point.

* * * * * * * * * * * * * * * * * * * *

YORRR suddenly Serena shared my blog post I very de paiseh leh
Likes collected up to this time this moment, ie 13/1/2014 7.14pm. LOL (macam pathetic saja XD)

It was published 2 months ago and no one seems interested in it leh wtf.

Anyway the page record shoot up to 39 views today! Whoa! The power of social media and influence of Serena! I kowtow to both of you and fly my kisses to you readers! Both in reality and those imagine by me! Nah catch it!

Hahaha paiseh seems like I was a bit overexcited with it and keep crapping LOL OK OK lets begin ba!

So I was assigned (I think I still am wtf) to solve the report performance at work and have, of course, consulted Serena for the solution. (Yeah babe, it's SOLUTION, not WORKAROUND yo!) OK *ahem* nevermind that was an internal joke.

ANYWAY! Back to the assignment. Apparently, one of the way to improve the performance is to allow some tasks to be performed by the .rdl file instead of letting the SQL query in the stored procedure to render. So for this entry, I'm going to talk about using decision function with "IIF" and/or "SWITCH" in the .rdl UI to replace the "CASE WHEN... THEN" in the SQL statement.

To show as example, I've created a sample data as below:
Sample data
Where:
Subjects:
1 = History, 2 = Maths, 3 = Science, 4 = English, 5 = Psychology, 6 = P.E.

Normally, this is what we'll do:
a. Write the stored procedure this way (Query type: Text)
Declare @SQL nvarchar(max);

Begin
-- Select statements for procedure here
Set @SQL = 'SELECT Participants,
CASE WHEN Subjects = 1 THEN ''History'' WHEN Subjects = 2 THEN ''Maths'' WHEN Subjects = 3 THEN ''Science'' WHEN Subjects = 4 THEN ''English'' WHEN Subjects = 5 THEN ''Psychology'' WHEN Subjects = 6 THEN ''P.E.'' ELSE ''OTHERS'' END AS Subjects,
CASE WHEN Grades = ''A+'' THEN ''Excellent!'' WHEN Grades = ''A-'' THEN ''Well Done!'' WHEN Grades = ''B+'' THEN ''Good!'' WHEN Grades = ''B'' THEN ''Could Do Better!'' WHEN Grades = ''B-'' THEN ''Need a Lil Push!''
WHEN Grades = ''C+'' THEN ''Gotta Work Harder!'' ELSE ''Hopeless!'' END AS Grades
FROM dbo.SampleTable (nolock) a'
End

EXEC sp_executesql @SQL

b. Create UI like this
Sample .rdl UI

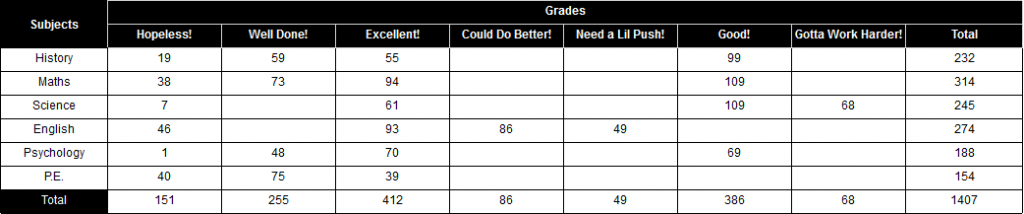
So the outcome will be like this:
Sample outcome
Click to see enlarged image
Note: Please ownself do necessary grouping in Step b. to get the above outcome ha.

ps: Don't nitpick over the description 'kay, it's just a sample.

* * * * * * * * * * * * * * * * * * * *

Begin:

So to let the UI take over the grouping task, here's what you can do:
a. Change all the "CASE WHEN... THEN" in the SQL statement as per below snippet
From
CASE WHEN Subjects = 1 THEN ''History'' WHEN Subjects = 2 THEN ''Maths'' WHEN Subjects = 3 THEN ''Science'' WHEN Subjects = 4 THEN ''English'' WHEN Subjects = 5 THEN ''Psychology'' WHEN Subjects = 6 THEN ''P.E.'' ELSE ''OTHERS'' END AS Subjects

To
Subjects

AND

From
CASE WHEN Grades = ''A+'' THEN ''Excellent!'' WHEN Grades = ''A-'' THEN ''Well Done!'' WHEN Grades = ''B+'' THEN ''Good!'' WHEN Grades = ''B'' THEN ''Could Do Better!'' WHEN Grades = ''B-'' THEN ''Need a Lil Push!'' WHEN Grades = ''C+'' THEN ''Gotta Work Harder!'' ELSE ''Hopeless!'' END AS Grades

To
Grades

As referring to sample above.

b. Change the .rdl file UI as per instruction below
SWITCH
Step 1: Right click on the cell you want to do the decision function as per shown in the image above. Click on "Expression..." to write the custom statement.
Step 2: When the pop up windows appear, write your own custom statement for the decision function.
Above image shown is an example of statement using SWITCH.
Syntax: =SWITCH(Cond1, Expr1, Cond2, Expr2, ...)

Very useful when you know what are your choices. But even if you don't - and you even need an "else" - you can always add in "1=1" as your condition followed by your "else" statement. Also used when there are more than 2 choices.

For example,
=SWITCH(..., Fields!Subjects.Value = 6, "P.E.", 1=1, "Others")

IIF
Step 3: Do the same to other cells that you want to change
Step 4: Write custom statements when pop up windows appear.
This one is using IIF statement.
Syntax: =IIF(Cond, true, false)

Usually IIF is used for 2 choices. But just like Excel, it can be used for multiple selections by just nesting them as shown in the example image!

The outcome
Click to enlarge
(Source: MSDN)

TADAH! There, you're good to go! ^^
Categories ,
Share/Like to turn a rhinoceros into a unicorn!

Thursday, 21 November 2013

SSRS 2012: Limit Number of Records Per Page

Scribbled by TeddieDebbie at 11:56 0 scream(s)
Note: Cuppycakes that came to this entry because it's really urgent to know how, kindly Ctrl+F "Begin:" to get to the point.

* * * * * * * * * * * * * * * * * * * *

Yo! First time doing tutorial here. As erjie and Serena has mentioned, I'm gonna do an experiment.

Aim: To find out which post categories are more popular.
Hypothesis: Tutorial posts are more popular compared to other lifestyle posts.
How to determine: Page views.
Duration: 2 weeks

* * * * * * * * * * * * * * * * * * * *

Begin:

Assuming you have a report created and you wanted to limit the number of records per page in SSRS. I suppose there's no default way to manage it but to create a workaround. Here's how.

Step 1: Right-click the Tablix handle "Details" at the Row Groups section, select "Add Group" and then "Parent Group..."

Step 2: When new windows appeared, click on the "fx" button at the right

Step 3: In the empty space, insert the formula/set the expression.
There are a few formulas that can be used:
1. =Ceiling((RowNumber(Nothing)/x))
2. =Floor((RowNumber(Nothing)/x))
3. =Int((RowNumber(Nothing)-1/x))
Where x = the number of records to display per report page.
(Source: MSDN Blogger)

There are difference between Ceiling and Floor when comes to double/float type:
a) SELECT CEILING(12.345), CEILING(-12.345) resulting in output of 13, -12;
b) SELECT FLOOR(12.345), FLOOR(-12.345) resulting in output of 12, -13.
(Source: TechNet)

But here you have nothing to worry about, the results will be the same because the parameter used is RowNumber. RowNumber is int, not double/float.

Step 4: When above steps done, the windows will become like this. Do not change anything, just click "OK".

The report should have following changes:
Step 5: Check for the new Group1 as Parent Group for "(Details)"
New column appeared beside the existing report column.

Step 6: Right click on the column of newly formed Group - Group1, and select "Delete Columns"

Step 7: Be extra careful not to select "Delete columns and associated groups". If you carelessly *ahem* deleted it, you've gotta start from Step 1 again.

Step 8: Back to the Row Groups section, right click "(Group1)", and select "Group Properties..."

Step 9: Select tab "Page Breaks", ONLY select option "Between each instance of a group"
Step 10: Select tab "Sorting", click on (not into!) the only column and delete it.

Voila! Now you can view your report with limited records per page!

Additional: As this is just the workaround, the report file exported in Excel format will show the records as per limited/set too - where pages will be displayed as sheets.

* * * * * * * * * * * * * * * * * * * *

Let the fun begin!


Update 2014-07-18:
Turned out this method is able to solve the Excel records limitation issue! Check out this page to get the idea.

Please note that the SSRS report will display the records in the exact same sequence as displayed in Excel sheets, so it is recommended to group them in the SQL statement beforehand.
Categories ,
Share/Like to turn a rhinoceros into a unicorn!
 

Teddie • Debbie Template by Ipietoon Blogger Template | Gadget Review